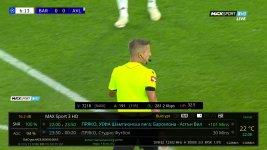
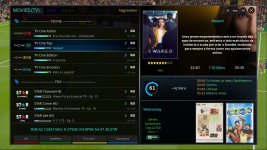
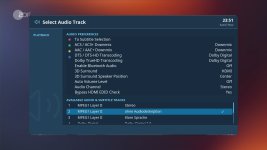
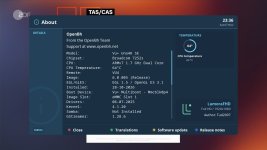
LumoraFHD – new skin for OpenBH 6.0 (work in progress)

tud2007

Member
Hello friends,

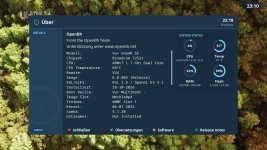
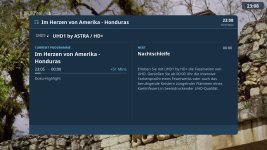
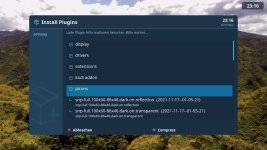
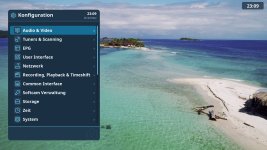
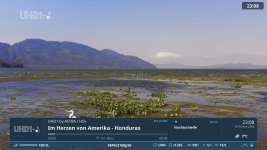
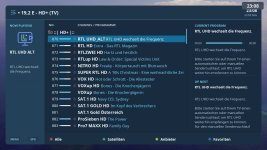
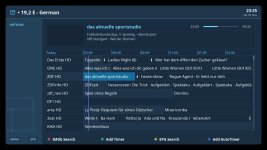
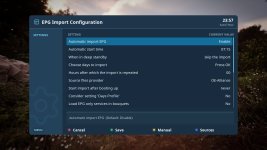
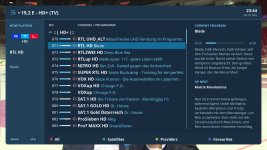
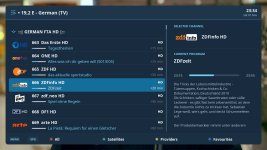
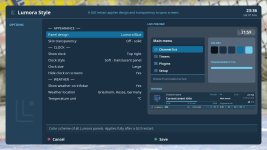
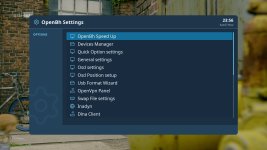
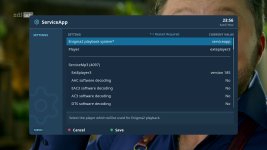
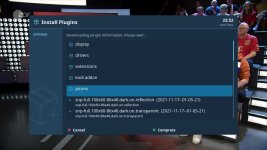
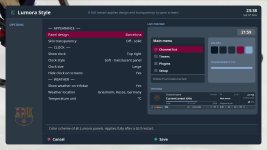
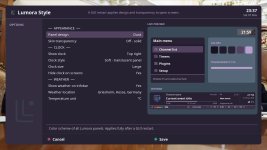
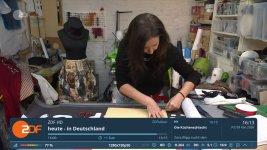
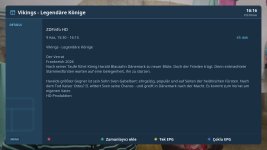
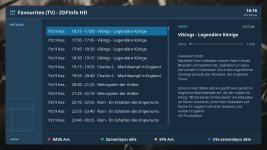
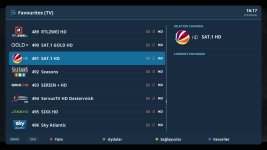
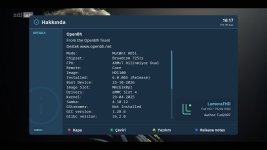
I'm working on a new skin called LumoraFHD for OpenBH 6.0. Most of it was developed with AI, as I don't have much free time. Even so, it took several days of work. Respect to those who earlier manually skinned every screen and detail without AI :)

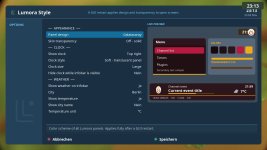
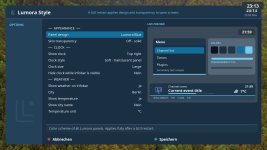
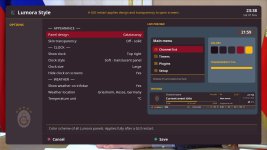
It's still unfinished. I haven't covered all the screens yet, and I'm still testing the layouts. It comes with a Lumora Style plugin that offers fixed color themes as well as custom colors. You can even pick a football team and the skin takes on its colors and logo, as in the last screenshot :)

I need a bit more time before I can release it, even for a first public test. I mainly use OpenBH and can only test on my Vu+ Uno4K SE, so I can't promise it works on other images or boxes. For that reason I'll share it only here in this forum once it's ready.

Feedback and screenshots are welcome in the meantime.


Regards
 

Attachments

  • about.jpg
    about.jpg
    331.4 KB · Views: 67
  • style.jpg
    style.jpg
    164.2 KB · Views: 63
  • style plugin.jpg
    style plugin.jpg
    189.2 KB · Views: 63
  • second infobar.jpg
    second infobar.jpg
    256 KB · Views: 60
  • plugins.jpg
    plugins.jpg
    240 KB · Views: 59
  • menu.jpg
    menu.jpg
    262.9 KB · Views: 66
  • infobar.jpg
    infobar.jpg
    281.6 KB · Views: 70
  • channel list.jpg
    channel list.jpg
    238.8 KB · Views: 71
@tud2007;

Colors,styles are gorgeous :)
I liked it so much.
Your skin work out likes to oe2.5 dream skins .
I am looking forward to seeing it asap

I can test and inform you bugs or thoughts if you send test skin.
 
I wish you success in this wonderful project.
It looks like a beautiful and wonderful skin; I'm eagerly awaiting its release. Thank you very much.
 
Hi, there is no separate renderer for the skin; everything is embedded in the style plugin and inline applets within the skin. I'll try to publish the first design by tomorrow. I also need to learn how to create an IPK package :unsure:
 
@Ev0 @AlexWilMac ;
Need your help to create IPK package.

To create an .ipk package for Enigma2 receivers, you must arrange your plugin files into a specific Unix directory structure alongside a mandatory CONTROL metadata directory, and then pack them using a build tool.
You can build the file directly on your Enigma2 box using ipkg-build via Telnet/SSH.


1. Set Up the Workspace Directory
Connect to your receiver via FTP (using a client like FileZilla) and create a workspace directory on your hard drive or USB stick, for example:
/media/hdd/myipk/


2. Replicate the Enigma2 Target Directory Tree
Inside your workspace folder, create the exact folder structure where your plugin files belong on the receiver. For example, if your plugin files go into the standard extension directory, build this structure:
/media/hdd/myipk/usr/lib/enigma2/python/Plugins/Extensions/MyPluginName/
Place all your Python files (.py), skins, and assets inside that final directory.


3. Create the CONTROL Metadata Folder
In the root of your workspace (/media/hdd/myipk/), create a new folder named exactly CONTROL (all uppercase). Inside this folder, create a plain text file named control (all lowercase) with no file extension. Open it with a Linux-compatible text editor (like Notepad++ or VS Code, using LF line endings) and fill out the package metadata:

Code:
Package: enigma2-plugin-extensions-mypluginname
Version: 1.0
Description: A short description of what my plugin does.
Section: extra
Priority: optional
Maintainer: YourName
Architecture: all
Depends: enigma2

(Optional: You can also place postinst or preinst shell scripts inside the CONTROL folder if you need custom scripts to run right after or before installation).


4. Package the IPK via Terminal
  1. Establish a Telnet or SSH connection to your receiver using a terminal or PuTTY.
  2. Install the compilation tools on your receiver if they aren't already present. You can download and manually install opkg-tools or Ipkg_Builder, or run:
    bash
    Code:
    opkg update && opkg install opkg-utils


  3. Navigate to your staging folder and pack the directory:
    bash
    Code:
    cd /media/hdd/ipkg-build myipk
    Use code with caution.

    (Note: Depending on the image, the command might be opkg-build myipk).
Your finished .ipk file will be generated directly inside /media/hdd/.


some more images as I cannot edit the first message, ipk package follows after last checks
 

Attachments

  • audiotrack.jpg
    audiotrack.jpg
    147.2 KB · Views: 26
  • about.jpg
    about.jpg
    157.6 KB · Views: 24
  • infobar.jpg
    infobar.jpg
    338.7 KB · Views: 26
  • help.jpg
    help.jpg
    200.1 KB · Views: 24
  • gridepg.jpg
    gridepg.jpg
    198.9 KB · Views: 24
  • epgimport.jpg
    epgimport.jpg
    182.4 KB · Views: 25
  • channellist_slim.jpg
    channellist_slim.jpg
    247.6 KB · Views: 26
  • channellist.jpg
    channellist.jpg
    200.2 KB · Views: 26
  • style.jpg
    style.jpg
    172.3 KB · Views: 24
  • setup.jpg
    setup.jpg
    196.5 KB · Views: 23
  • settings.jpg
    settings.jpg
    182.7 KB · Views: 22
  • serviceapp.jpg
    serviceapp.jpg
    158.4 KB · Views: 23
  • screensaver.jpg
    screensaver.jpg
    170.6 KB · Views: 21
  • plugins.jpg
    plugins.jpg
    195 KB · Views: 23
  • style_barcelona.jpg
    style_barcelona.jpg
    154.9 KB · Views: 23
  • style_dusk.jpg
    style_dusk.jpg
    165.3 KB · Views: 23
  • style_galatasaray.jpg
    style_galatasaray.jpg
    174 KB · Views: 26
  • systeminfo.jpg
    systeminfo.jpg
    149.7 KB · Views: 25
@Ev0 @AlexWilMac ;
Need your help to create IPK package.
you can use this tool
enigma2-plugin-extensions-opkg-tools_1.4_all.ipk

FYI:
The ipk or folder you are trying to pack / unpack must be in /hdd/ipkg-tools folder.

Build ipk packages is really simply.
You don't need strange plugins or devel tools.

1) Upload the file enigma2-plugin-extensions-opkg-tools_1.4_all.ipk in your /tmp and install via addons manual install panel
2) Create a work directory in you box like for example /media/hdd/ipkg-tools/myipk
3) Prepare your plugin with full directory tree (ie usr/lib/enigma2/python/Plugins/Extensions/meoboot)
4) Prepare a folder named CONTROL (uppercase) and put inside the file control (lowercase). If you need you can add the files preinst and postinst too.
5) Upload plugin full path folder and CONTROL folder in your work directory: /media/hdd/ipkg-tools/myipk
6) digit command from telnet

cd /media/hdd/ipkg-tools/

ipkg-build myipk

ALL DONE. You will find your package in your /media/hdd/ipkg-tools/ folder

Br.
 
Hello friends,

as promised, here is the first public beta of LumoraFHD for OpenBH 6.0, together with the Lumora Style plugin.

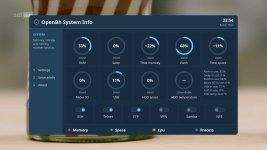
LumoraFHD is made for Full HD, 1920×1080. It includes layouts for the main OpenBH menus, infobars, channel lists, EPG, playback, settings and many information screens as attached in previous posts.

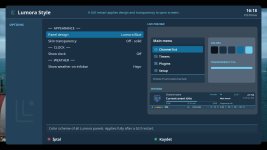
The included Lumora Style plugin lets you choose from several color styles, including dark and daylight designs. You can also add your own styles using JSON files. There are optional sample football team styles with kit colors, logos and default picons. This was always I wanted to have in a skin myself.

The plugin also has settings for skin transparency, an integrated permanent clock and simple weather information on the infobar.
The skin and plugin come in one package. The team styles are optional and in a separate archive, maybe later some car styles, too.

To install the skin, copy the attached IPK file to /tmp/ on your receiver. Install it with the local package installer in OpenBH, or use SSH:

Bash:
opkg install /tmp/enigma2-plugin-skins-lumorafhd_VERSION_all.ipk

After installation, restart the GUI. Then select Lumorafhd in the skin settings and confirm the next GUI restart.

You will find Lumora Style in the plugin browser. Under Panel design, choose the style you like. The live preview shows a menu and an infobar so you can see the colors before saving.

Save your changes and restart the GUI when asked. Many elements already update when you change the style, but I still recommend a GUI restart so everything uses the new colors and transparency.

To add the team styles, extract the separate archive team_styles.zip and extract the LumoraStyle folder into: /etc/enigma2/

The folders should look like this:

Code:
/etc/enigma2/LumoraStyle/

├── themes/
│   ├── galatasaray.json
│   ├── real_madrid.json
│   └── ...
└── logos/
    ├── galatasaray-logo.png
    ├── galatasaray-picon.png
    ├── real-madrid-logo.png
    ├── real-madrid-picon.png
    └── ...

The JSON files go in themes/, and the PNG images go in logos/. Restart the GUI after copying them. The new styles will then appear under Panel design.
The logos and new team picons have 20% visibility for a soft watermark effect.

You can also make your own style without editing skin.xml. Copy this file:

Code:
/etc/enigma2/LumoraStyle/themes/_example.json

Give the copy a name such as my_style.json and open it with a plain text editor.

There are five main colors:
- background: for the main background.
- card: for content panels.
- side: for navigation and header areas.
- selection: for the selected list item.
- selectionShade: for its extra shade.

There are also two highlight colors, accent and accent2. You can set text and secondary yourself, or leave them out and let the plugin choose them.

Here is an example:

JSON:
{
  "name": "My custom style",
  "background": "#101820",
  "card": "#18242f",
  "side": "#20313f",
  "selection": "#2b6f9e",
  "selectionShade": "#1e4d70",
  "accent": "#f2c14e",
  "accent2": "#7fc8f8",
  "text": "#ffffff",
  "secondary": "#b8c4cf",
  "logo": "my-style-logo.png",
  "picon": "my-style-picon.png"
}

Use PNG files with a transparent background. The recommended size is 176×208 for logo and 220×132 for picons. Each image must be smaller than 256 KB.
Restart the GUI after adding a new style. More details are in the README.txt file inside the themes folder.

Please report any layout problems or screens I have missed, and check the performance on non 4k receivers. An OSD screenshot helps a lot. Please also include your receiver model, the selected style, and the steps needed to open that screen. If the receiver crashes, please attach the full crashlog and a debug log if available. I need enough information to try the same steps on my receiver.

If you are unsure of the screen name, KiddaC Skin E2sentials by @kiddac can show it on the screen. You can find it on [LinuxSat Support]

I mainly use OpenBH, so I will share updates and give support only here in this forum.

Thanks to everyone who tries it and sends feedback.

Regards

 

Attachments
@tud2007

I have just installed obh 6.005 image and
the result is here

Welcome to openbh for mutant51
openbh 6.0 mutant51

mutant51 login: root
Password:
root@mutant51:~# cd /tmp
root@mutant51:/tmp# opkg install enigma2-plugin-skins-lumorafhd_0.1.0_all.ipk
Solver encountered 1 problem(s):
Problem 1/1:
- conflicting requests
- nothing provides enigma2 needed by enigma2-plugin-skins-lumorafhd-0.1.0.all

Solution 1:
- do not ask to install enigma2-plugin-skins-lumorafhd-0.1.0.all


root@mutant51:/tmp#
 
I manually installed this wonderful skin
 

Attachments

  • lumorafhd.jpg
    lumorafhd.jpg
    249.6 KB · Views: 10
  • 1.jpg
    1.jpg
    125.5 KB · Views: 10
  • 2.jpg
    2.jpg
    214.6 KB · Views: 10
  • 3.jpg
    3.jpg
    113.9 KB · Views: 11
  • 4.jpg
    4.jpg
    121.6 KB · Views: 11
  • 5.jpg
    5.jpg
    117 KB · Views: 11
  • 6.jpg
    6.jpg
    177.4 KB · Views: 11
Hi, still no idea why there is no enigma2 package on a mutant51, thought it's common on all enigma2 images. maybe developers have an explanation.
 
Back
Top